31 December 2011

Last post of 2011 - Glitter & Glisten Ornaments

It has been a busy December...


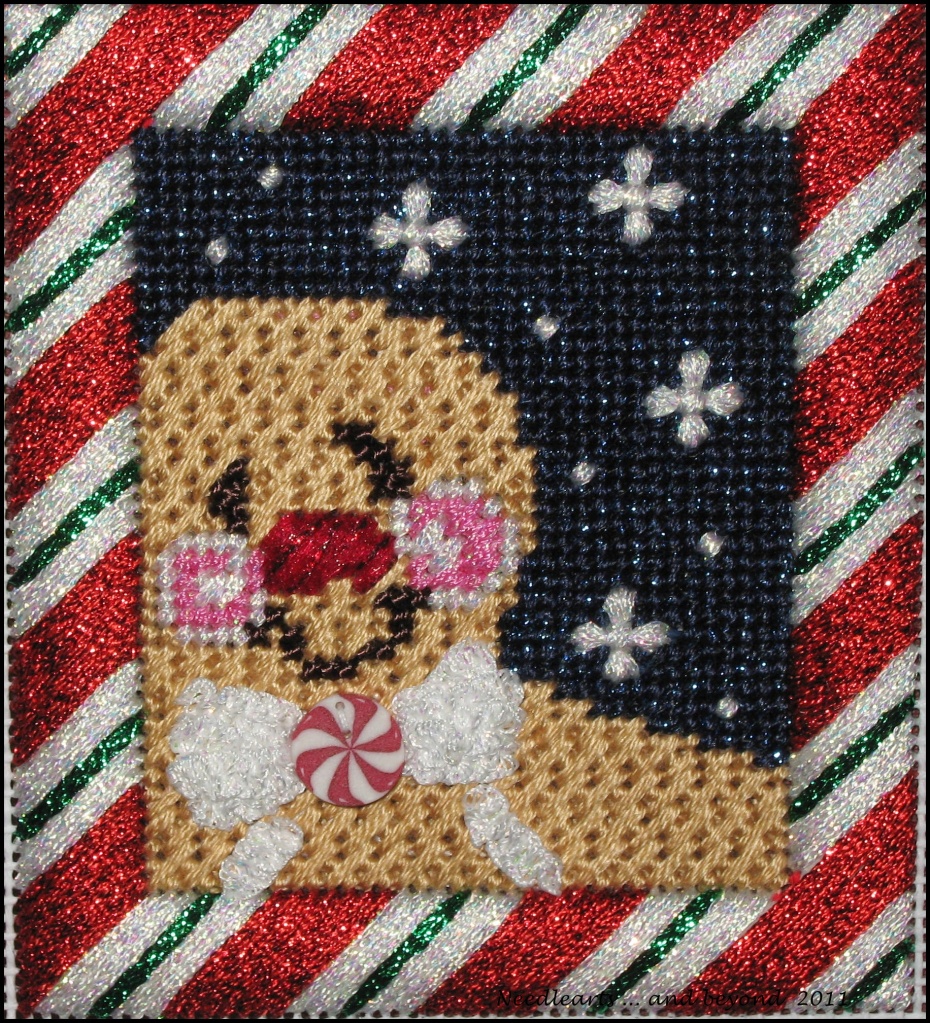
These are pics of some ornaments that I made this month.  They are from kits that I picked up on ebay earlier this year. The ornaments are called Glitter & Glisten from Lee Ward's and Carter's Dexter's - probably from the early 1970's.  Needless to say, they didn't want to have their photos taken and I couldn't get a good picture.

They look super on the tree -- but since the tree is already down, perhaps next year.

I hope you had a Merry Christmas and have a Happy New Year!

17 December 2011

Pillowcases - tips that work for me


Pillowcase projects are lined up in my sewing room and I have completed three this week.  These are a great gift for any occasion.  Before I started this batch of cases, I browsed through the various instructions and tutorials as a refresher.

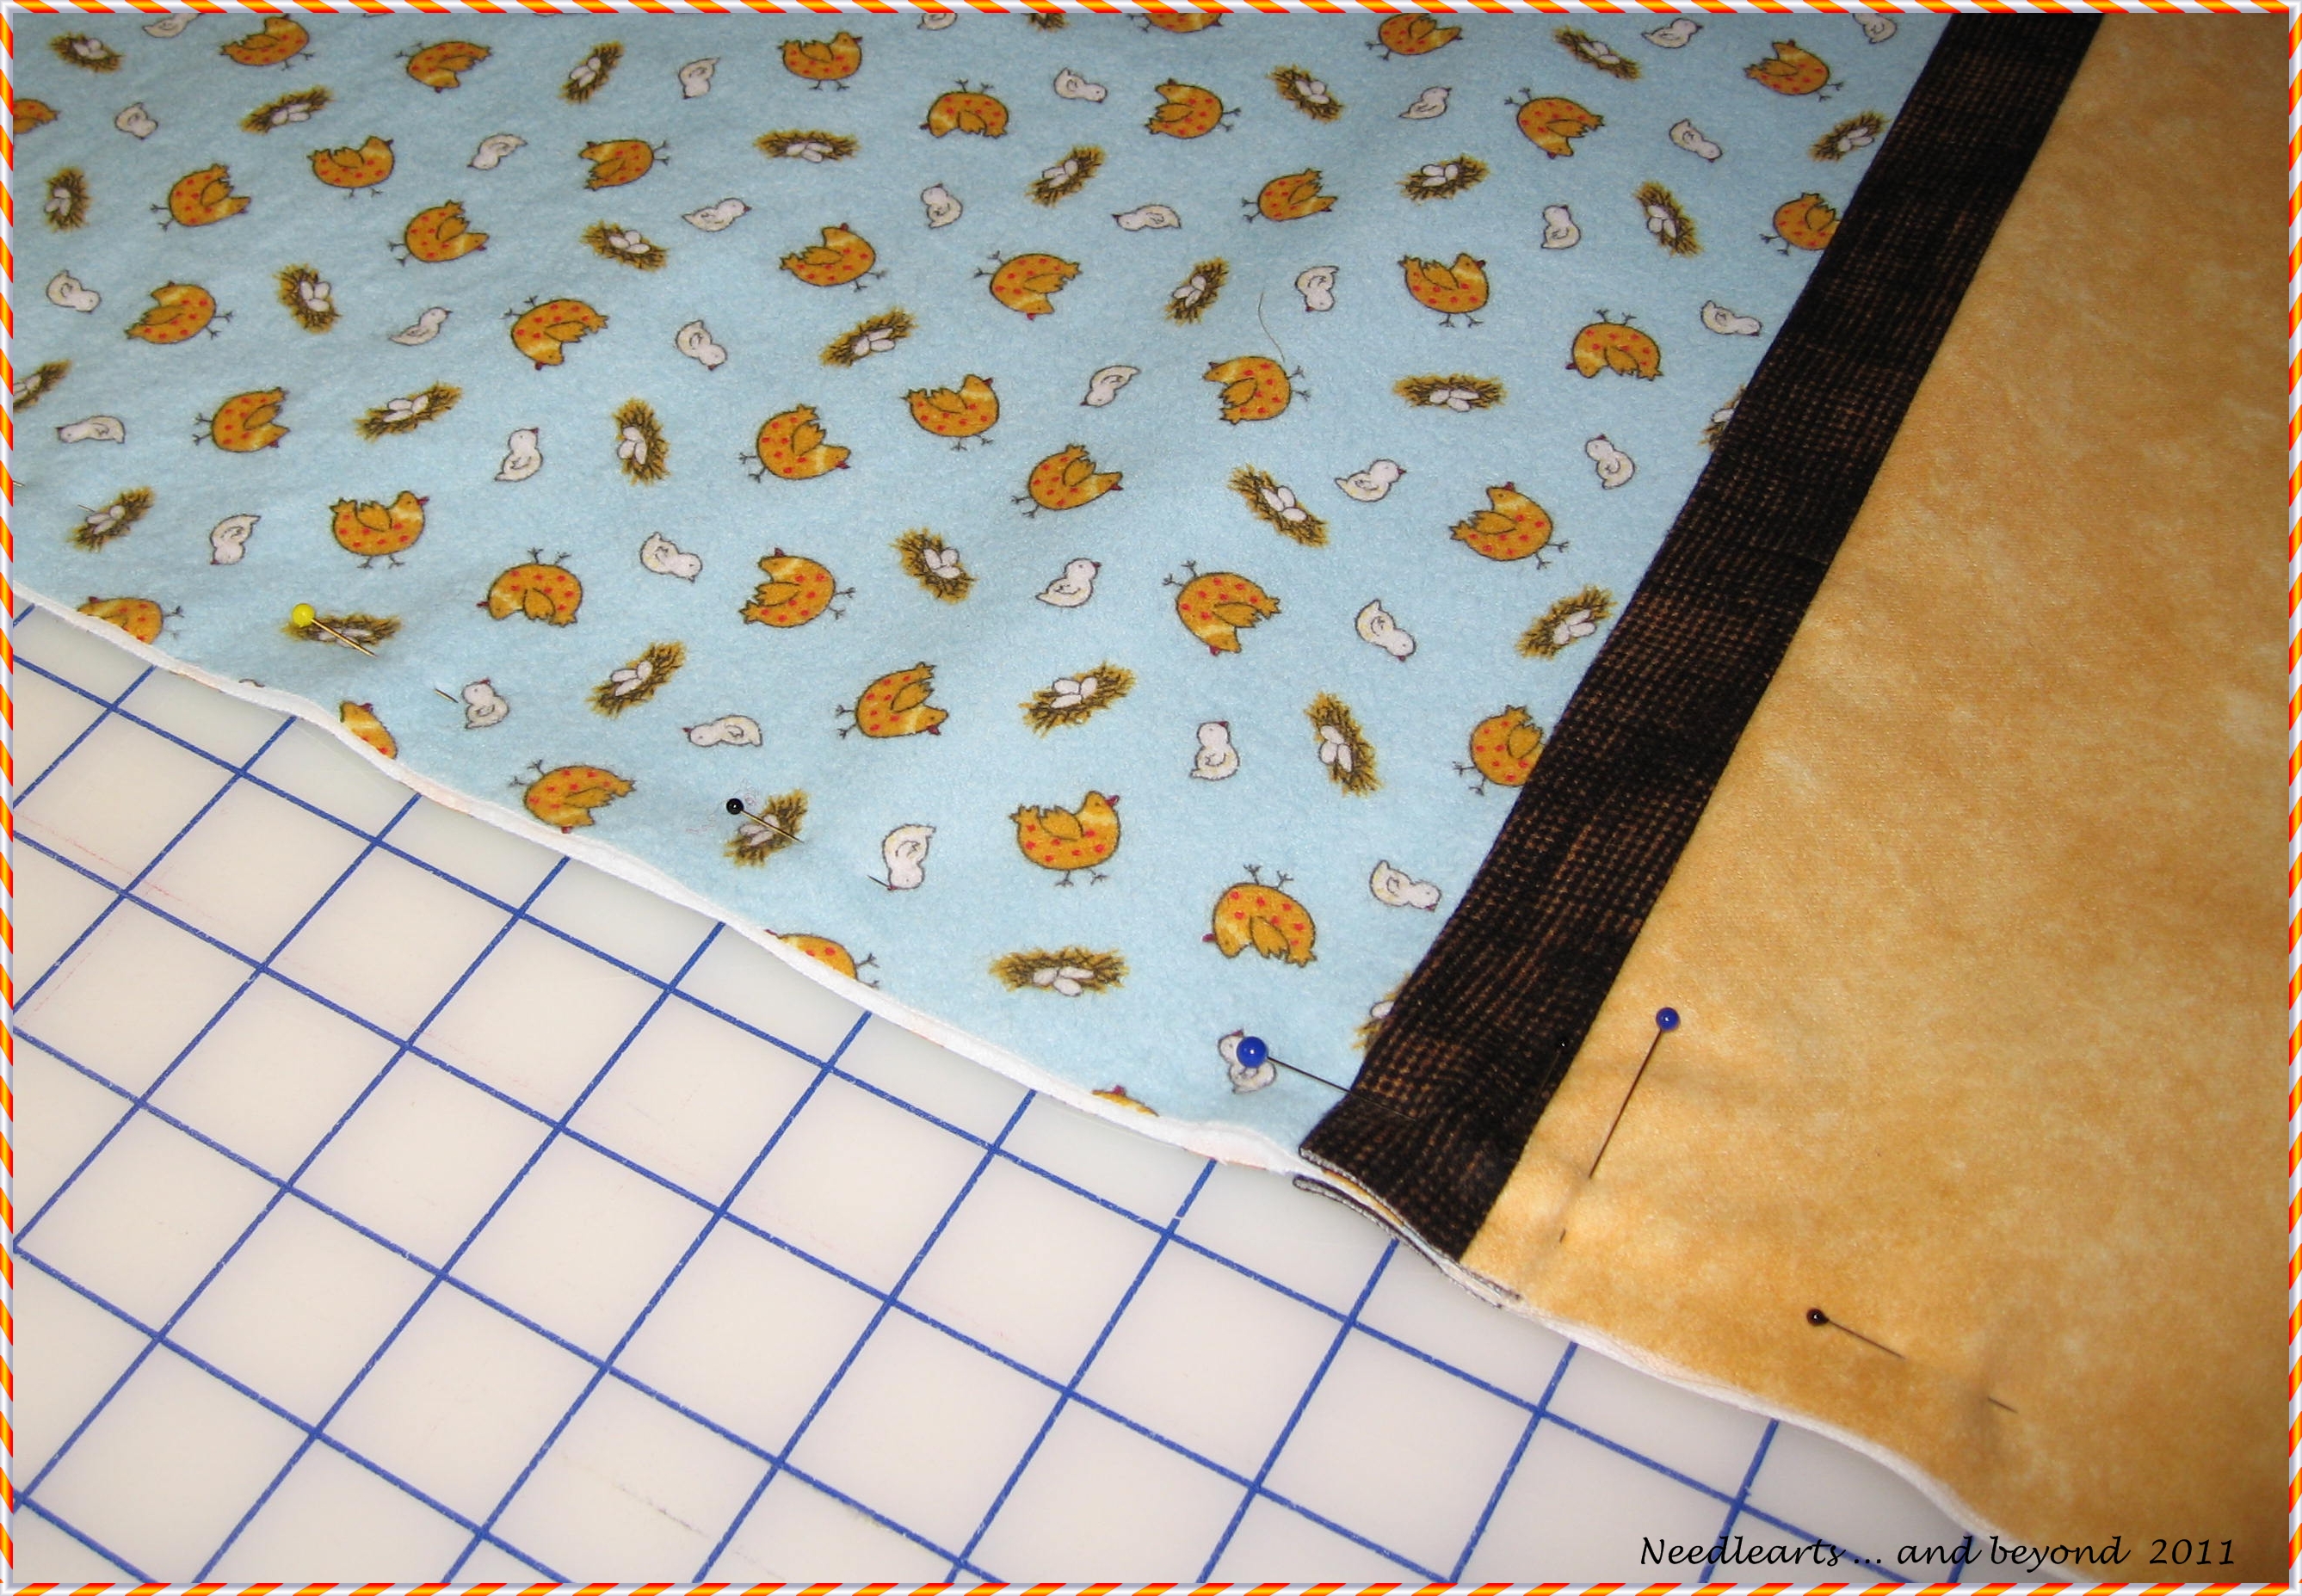
If you are new to pillowcases there are several wonderful photo tutorials as well as some great youtube videos.   There are a couple of things that can make it easier to complete the process.  When making a case using piping or trim, by the time you get the the final step -- finishing the french seam -- you will be going through 14 layers of fabric but the bulk of 28.  If you pillowcase is made of flannel it can be really hard to keep it moving and neat.

1) if available, use a walking foot.  this will help control the layers so that they stay even, helping the cuff/trim seams to line up.

2) I find that hand cranking the machine as I go through the bulk gives me better progress and control.  You might find that you will need to help the fabric along, I do.  Don't try to pull the fabric through the machine -- if you need to, lift the presser foot give a fabric a nudge (not more than a stitch length) put the presser foot back down and continue to hand crank.

3) wash and press (or rinse and spin) your fabric before you begin the process.  I know that there is quite a bit of dialog regarding washing prior to quilting -- this isn't a quilt.   As fabric is prepared for sale it is stretched -- washing helps it spring back to it's natural state.  You don't want your pillowcase to shift sideways or the cuff to go wonky after it has been washed.

12 December 2011

On The Stove by N. Strelkina - Heaven and Earth Designs

"On the Stove" - original art by N. Strelkina


photo from -- http://public.fotki.com/strelkina/boxes-fedoskino/580.html

There are a few companies that create cross stitch charts that are massive, intimidating and amazing.  One of them is Heaven and Earth Designs (HAED) , they have an extremely large and diverse selection of charts available -- to date, I have purchased three and have my eye on a few more.  I'm a little reluctant to make too much of an investment in additional charts because most do not show a completed stitched piece and I find that a bit odd.  Based on the number of new charts that are added to the website I'll guess that they are using a program that helps to ensure accuracy.

Despite my concern, I have gathered all of the supplies to start my first HAED - "On The Stove" by Nadezhda Strelkina.  This is so beautiful that I couldn't help myself.  I suppose it would be much easier to order a print but this piece is speaking to me.  The chart count is 350 x 457 -- larger than anything I have stitched (or attempted to stitch).

"On the Stove" was included in my 2012 stitching goals as a new start.  There is no doubt that it will be a project that will span years.

11 December 2011

Christmas Potpourri BOM Quilt Block 4

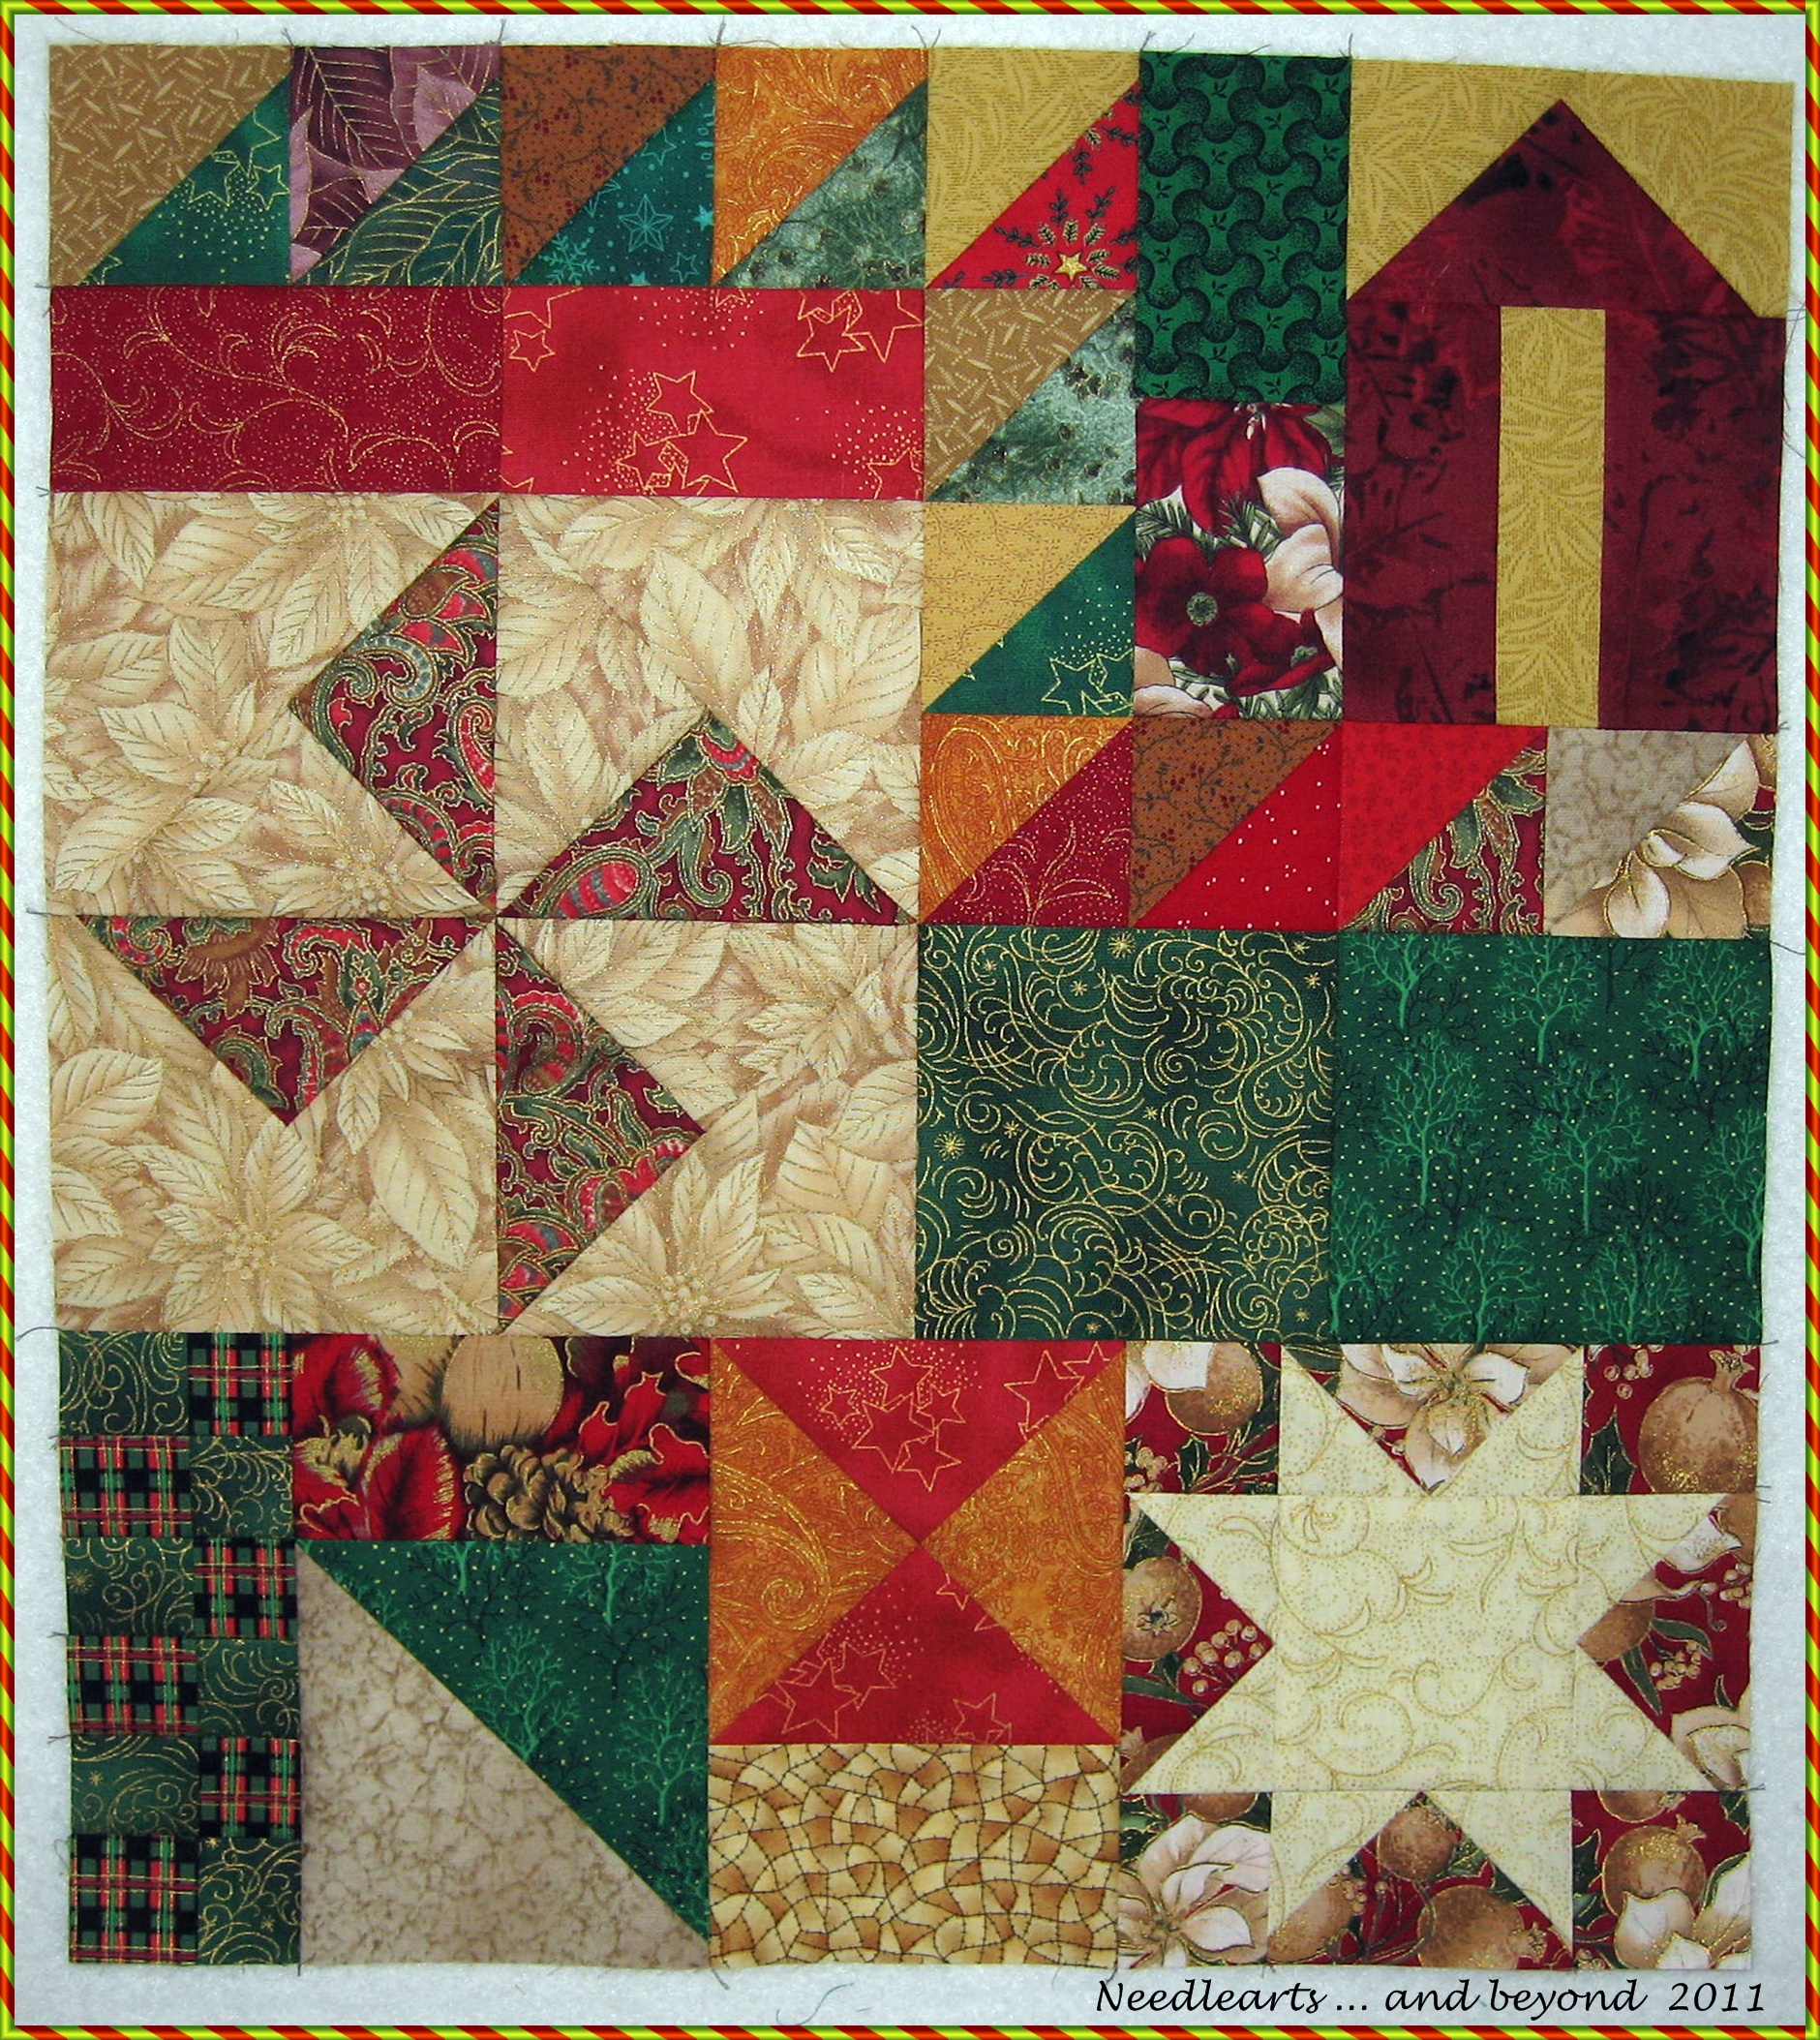
Today I finished block 4 of the Christmas Block of the Month Quilt.  I'm a little distracted this time of the year and managed to make one sewing mistake that I was not willing to change.  The star in the bottom right should be dark with a light background -- oops!  Not changing it.

07 December 2011

New Year / New Goals - Stitching 2012

Last year was the first time I set stitching goals for myself. All in all, it worked out pretty well so I am going to try it again. The most important thing was that the goals could be changed at any time.  Having something to remind me of what I would like to accomplish was great since I am easily distracted with new projects.

2012 Stitching Goals

Projects in progress:
St Basil's needlepoint
TS Bear needlepoint stocking
Tish Celebration needlepoint (any progress counts!)
Christmas Potpourri BOM quilt
Knit bandages - on going (and very portable)

New projects:
Heaven & Earth Designs cross stitch On the Stove (nope, I don't expect to finish it)
Christmas ornaments - 3 each - needlepoint, cross stitch, bead/sequin & felt/sequin
HeartStrings needlepoint The Carolers - complete 3 of the set
Lap Quilt - using only kit or fabrics already owned
Two full size quilts - using only kits or fabrics already owned

This is a very do-able list! The trick will be to stitch in the evening rather than spend all night surfing the internet or playing games!

29 November 2011

Christmas Potpourri Quilt - Block 3

Block Three of Christmas Potpourri


Finding time to sew or stitch during November and December is a challenge.  This is block 3 of the Christmas Potpourri Quilt -- the purple is a little funky but -- what the heck!  I have made some of the half-square triangles for the border with the same fabric so I might be able to get a little balance.


17 November 2011

Christmas BOM Quilt - Block 2

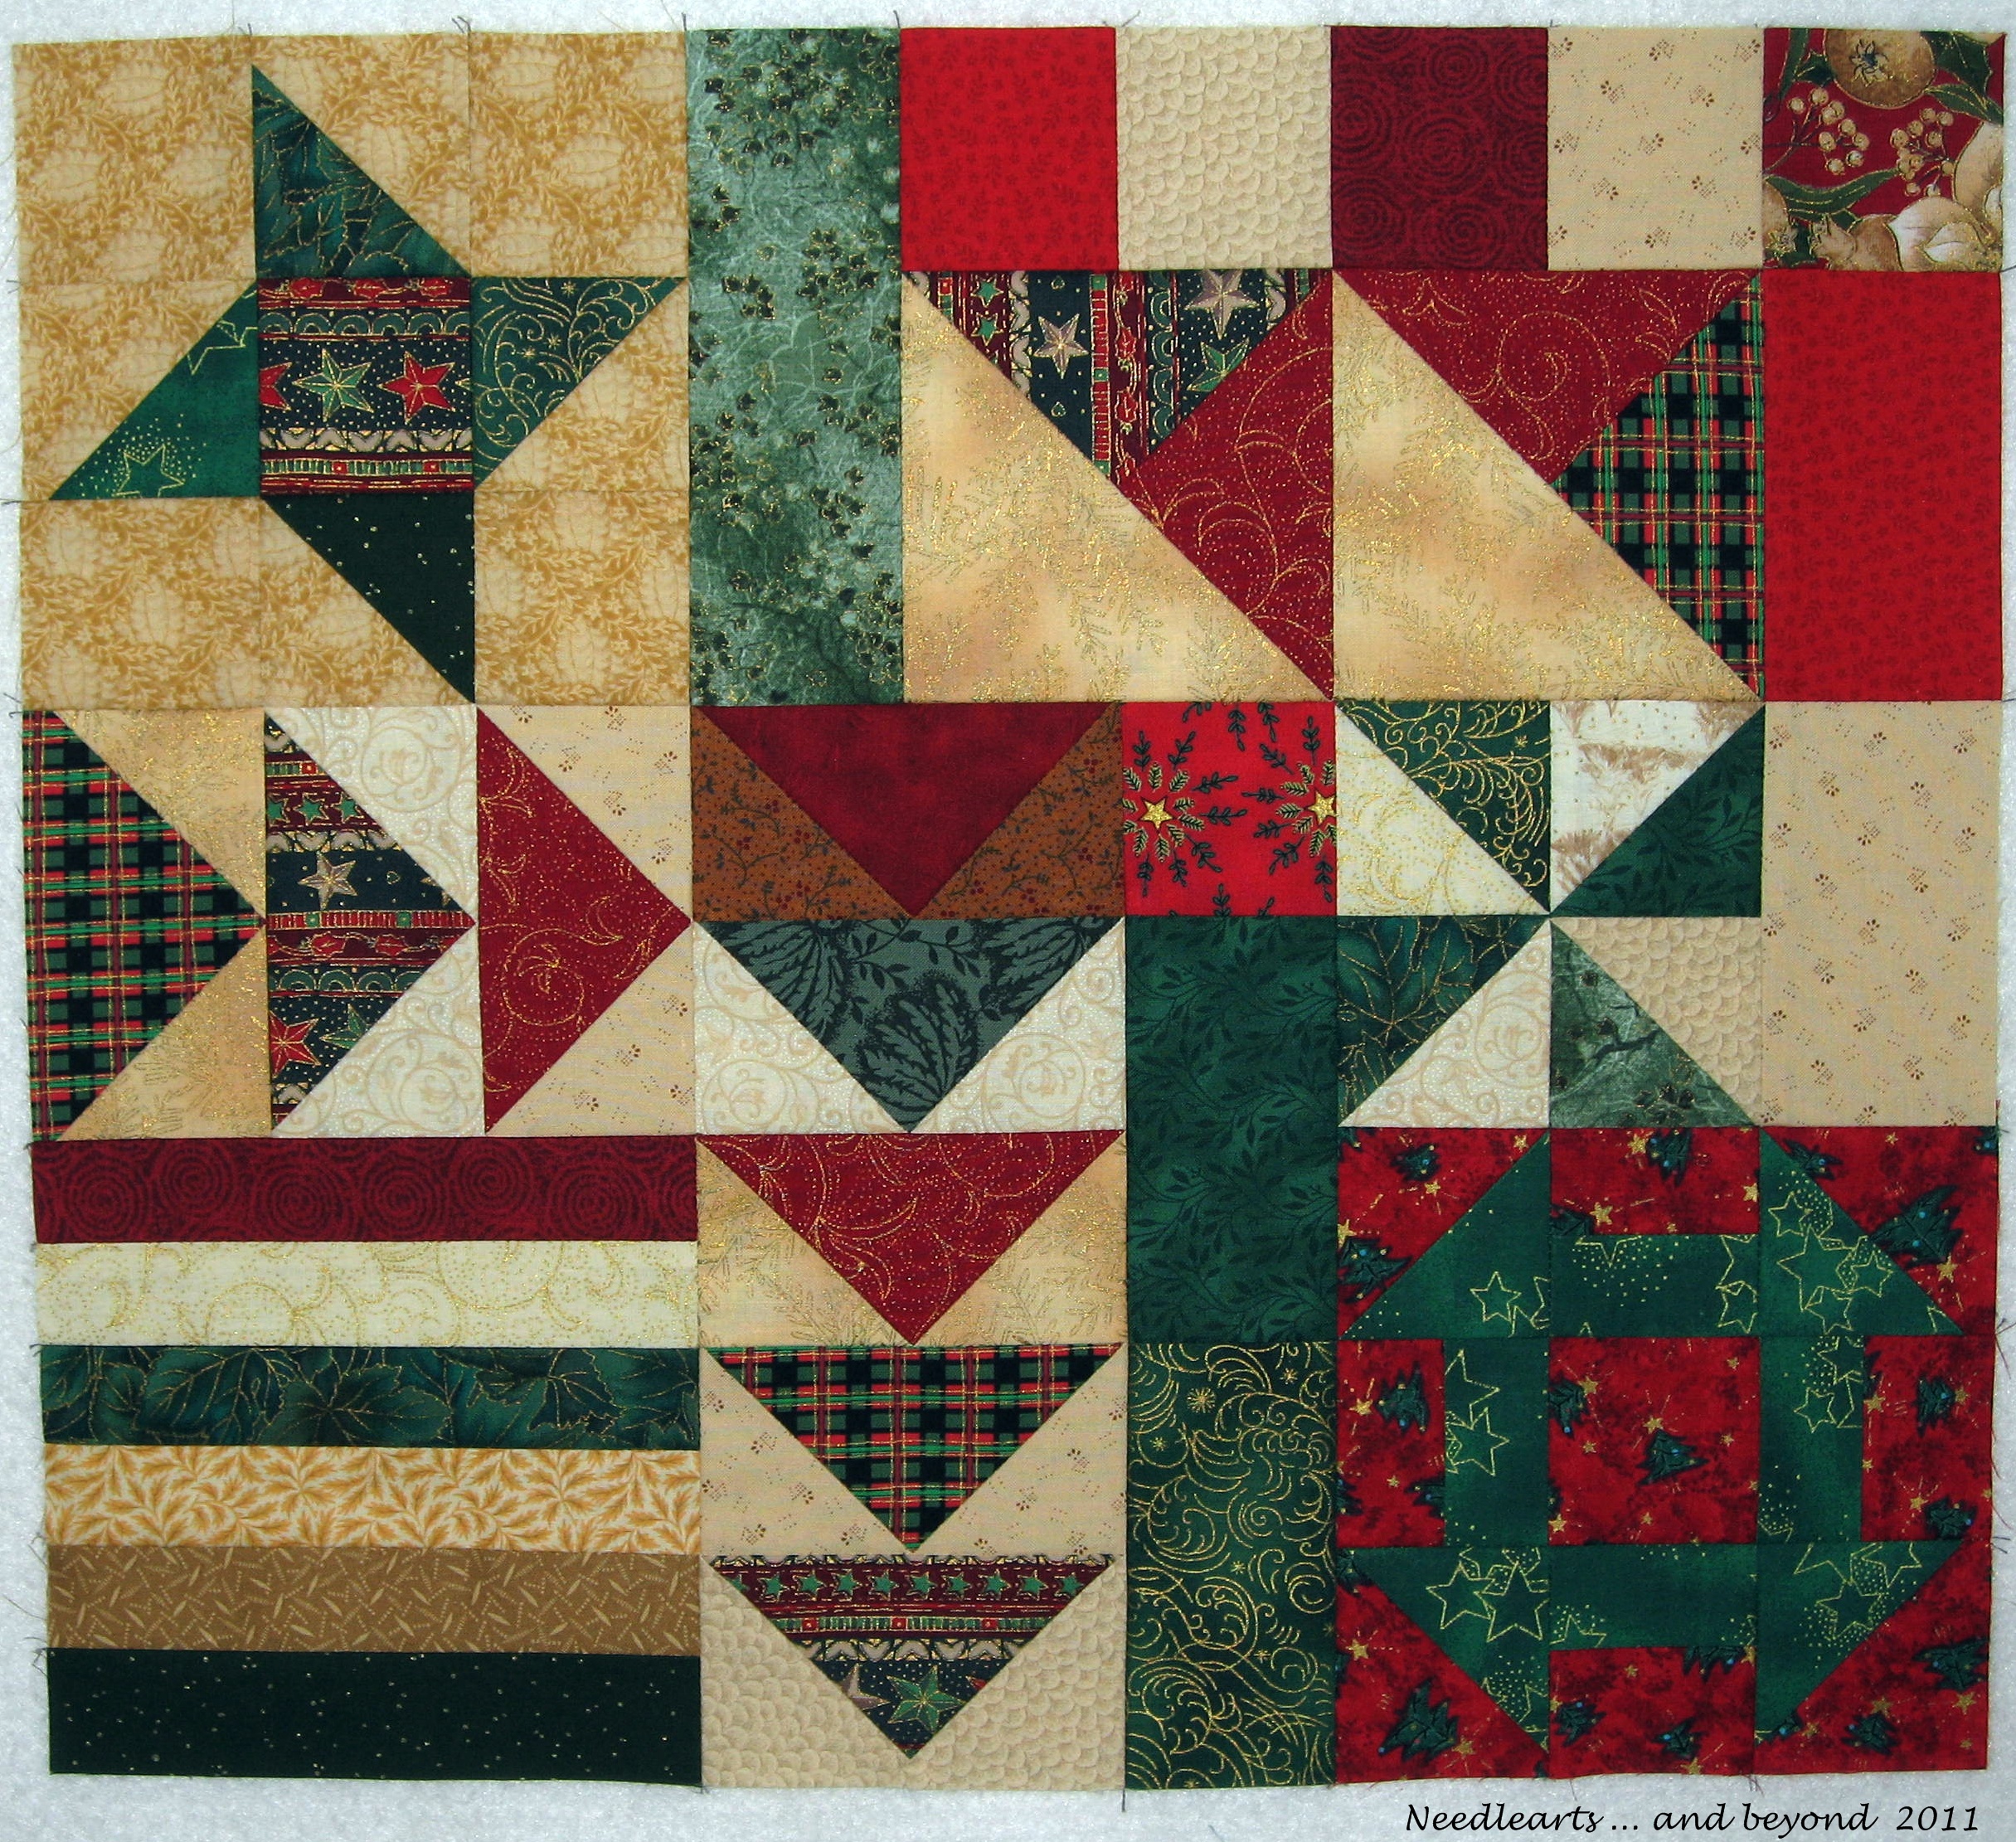
Here is the completed block 2 for the Christmas Potpourri BOM.  A few fabric changes were needed.  I have a cold and kept making mistakes but really, really wanted to complete the block ... so ... into the scrap drawer to find fabrics to replace the ones that got messed up.  Hope it still looks good to me after I'm feeling better.

15 November 2011

Christmas Potpourri BOM - Block 2

This is block two of the current Christmas BOM -- in progress.  I'm still auditioning fabrics and blocks for placement positions but this should be pretty close to the finished block.

I added a new gadget to my crafting room.  This past week I bought a Pressing Betty.  I've only used it for a couple of days and I'm not sure if I like it or not -- change is hard!  A couple more weeks and I hope that I will have used it enough for a real opinion.

06 November 2011

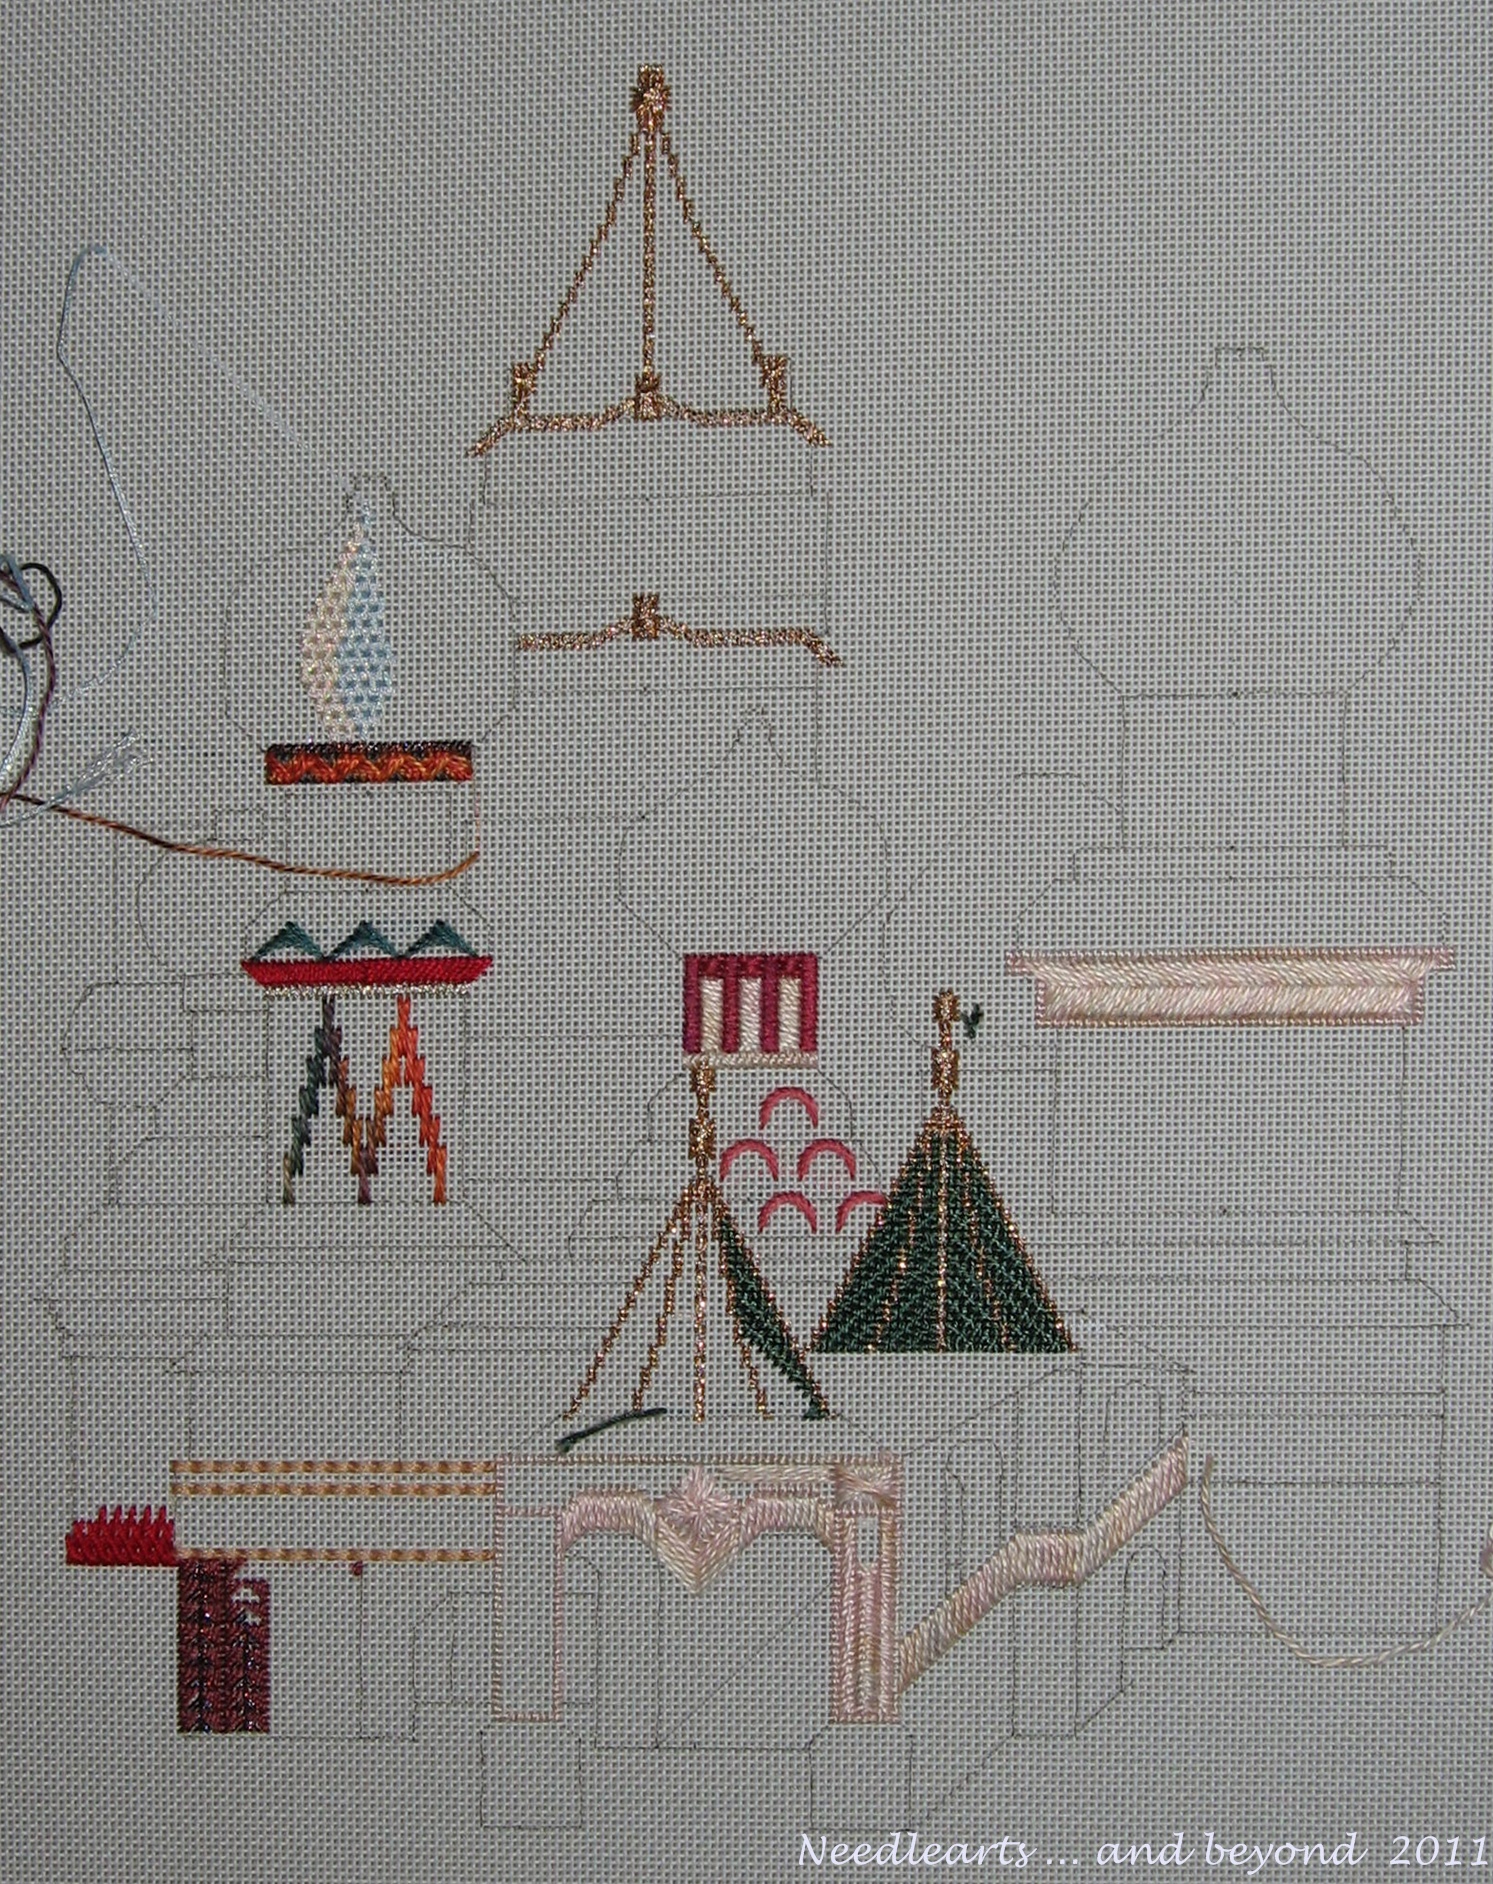
St. Basil's Needlepoint by Carole Lake


St. Basil's Cathedral - from Google earth


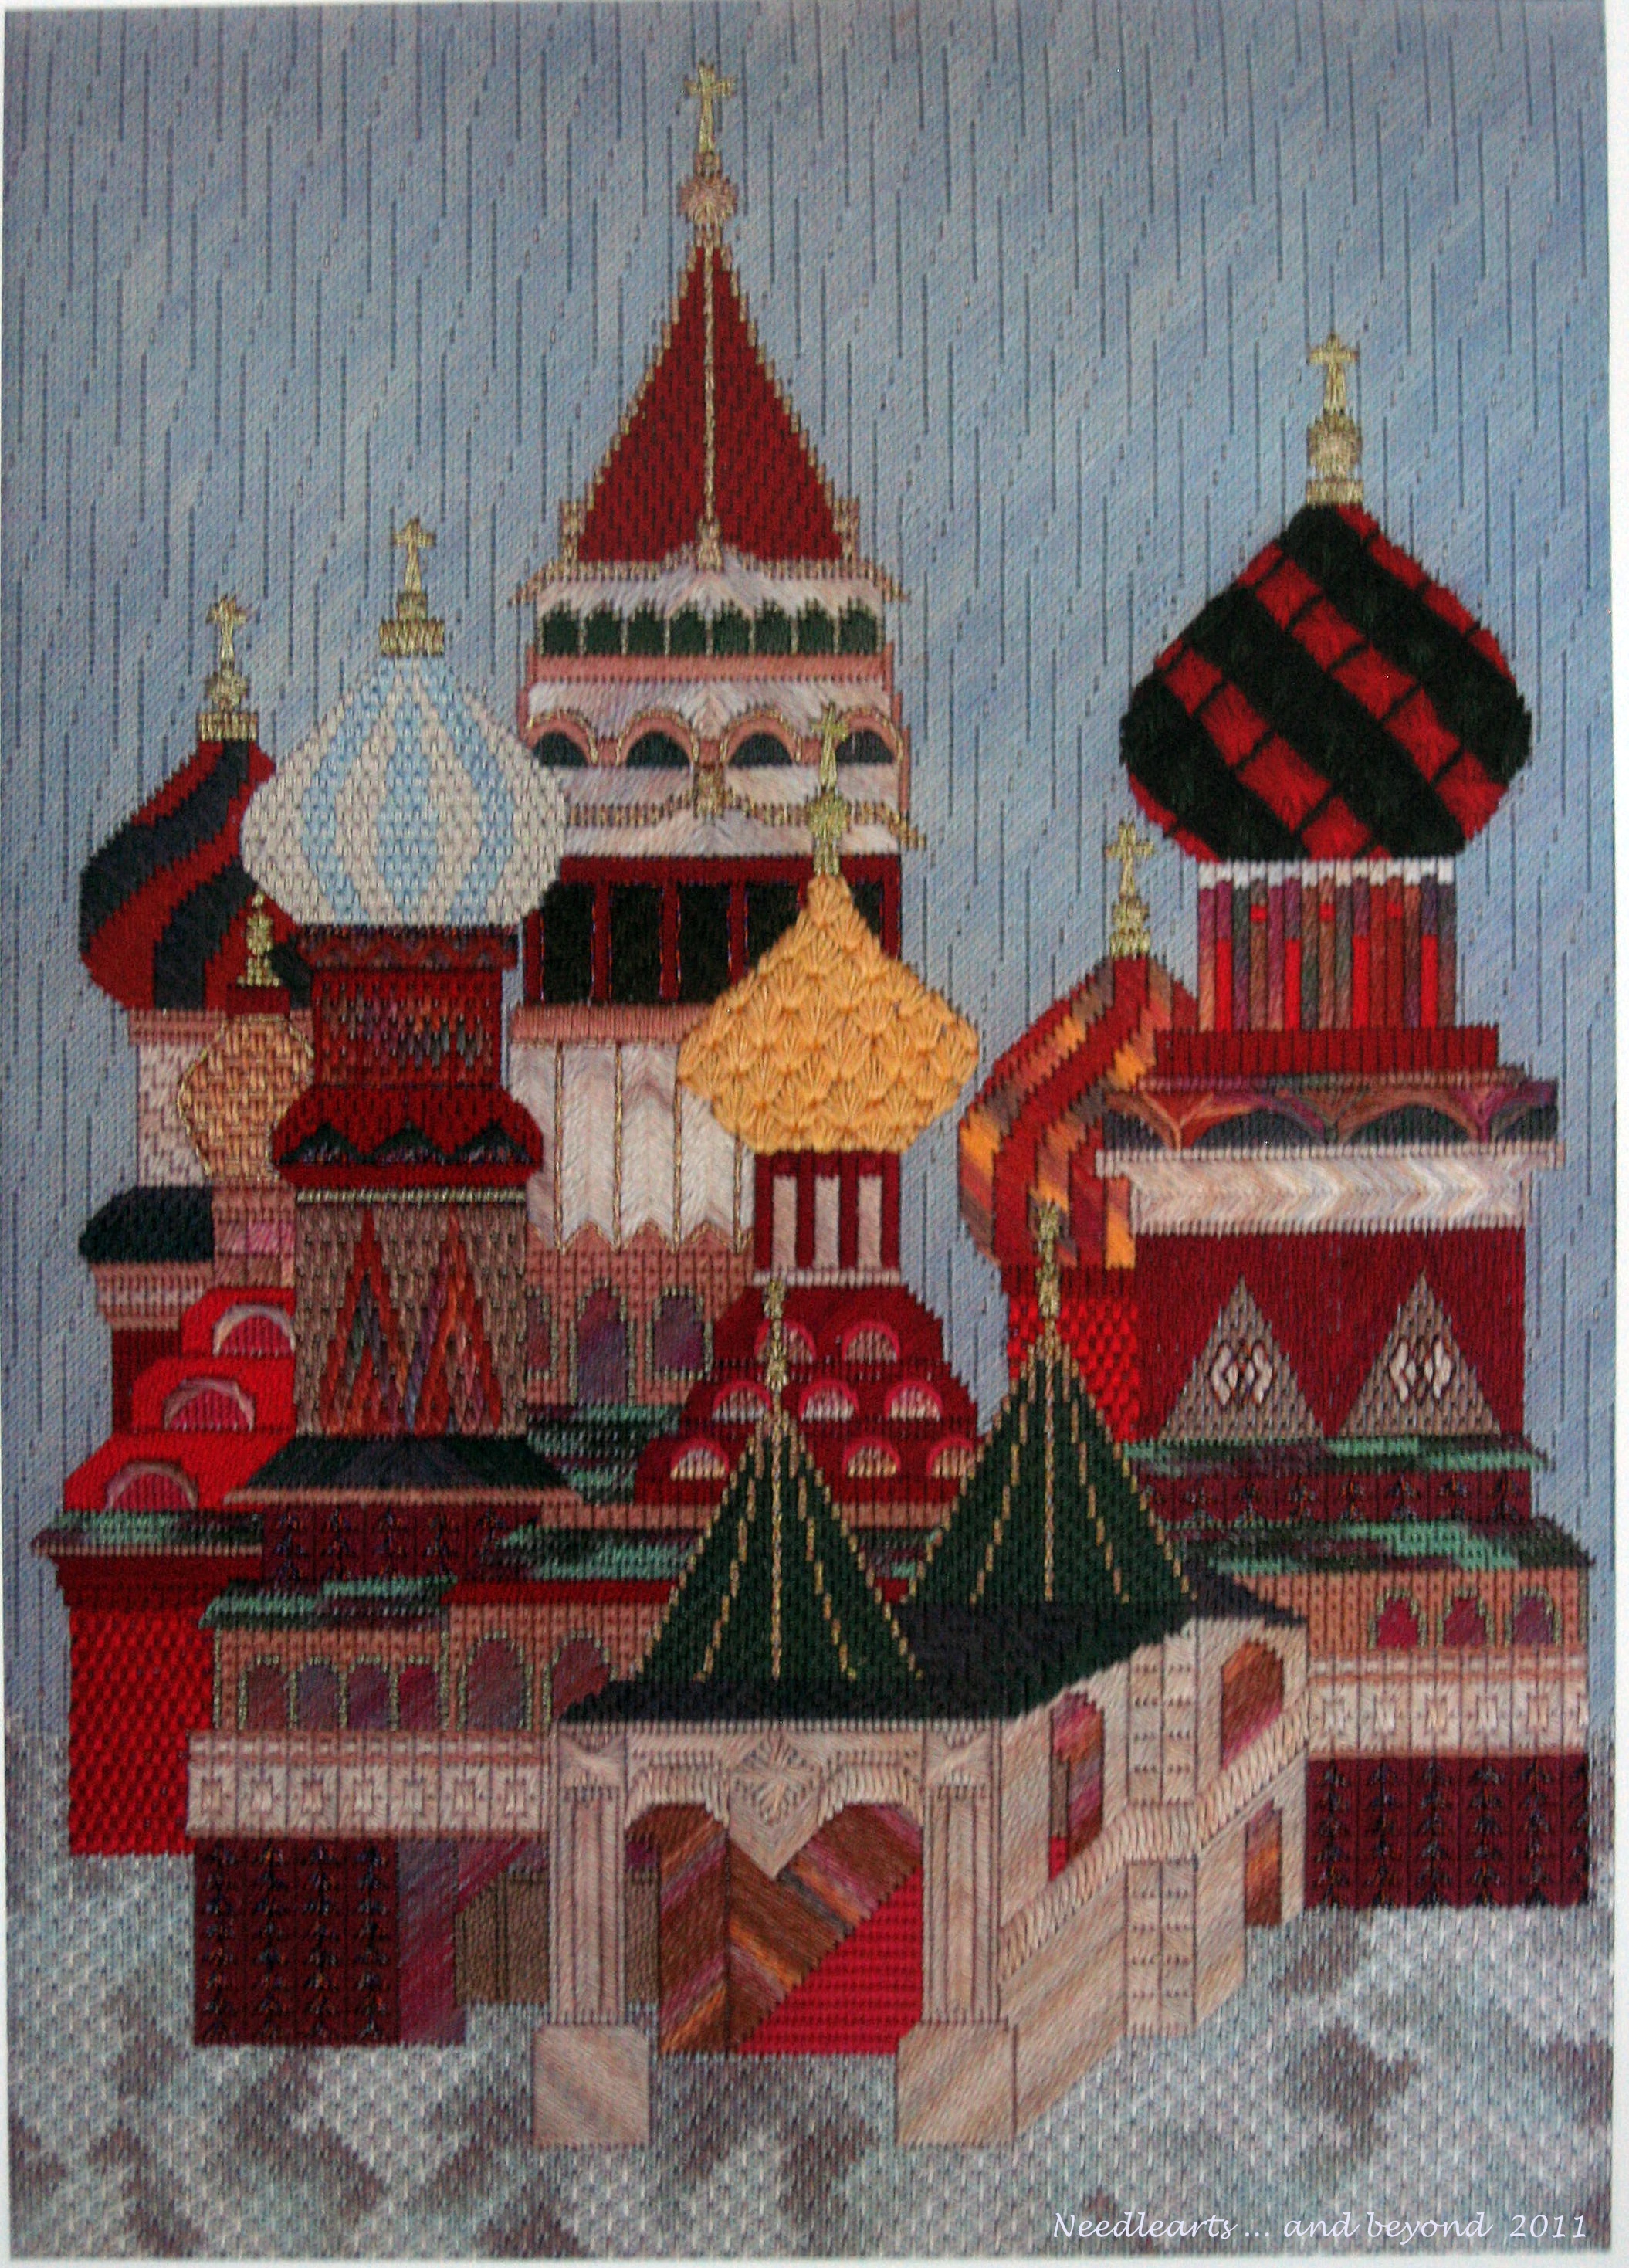
This past week I attended a three day class for the fabulous "St. Basil's Cathedral" needlepoint project by Carole Lake.  The photo above is fairly close to the view of the Cathedral in Carole's needlepoint piece.  You can see her piece on her website at:  Carole Lake's St. Basil's.

Completed Project - image provided as part of class


As part of the kit, we were provided with a copy of the completed project.  The image above is actually a photo of that copy.


This was my first Carole Lake class.  It was all that a stitcher hopes for in a class -- a great piece, an interesting instructor and a fun group of students.  Ms. Lake's stitch instructions are superb -- they are extremely well organized and detailed.  She provided a nice balance of instruction time and stitching time and her sense of humor is contagious.


St. Basil's on 6.November.11


At present, I have no major changes planned for this piece.  The shape of some of the onion domes will likely be altered to be a bit more onion-like and I'm not sure what I want to do with the ground.  I do expect to use the colors and threads provided in the kit.


Needless to say, I have not made any progress on other projects.


26 October 2011

Christmas Potpourri BOM - Block One


This is the first block for the Christmas BOM Quilt -- the finished size for each block is 18" - the block is currently at 16".  The block construction is rather interesting, the inner border of half-square triangles is actually designed as part of each of the 10 outer blocks.   I made the first set of  hs triangles but have decided to wait until all the blocks are complete to decide how the position the colors.

22 October 2011

Christmas Potpourri Quilt Block of the Month


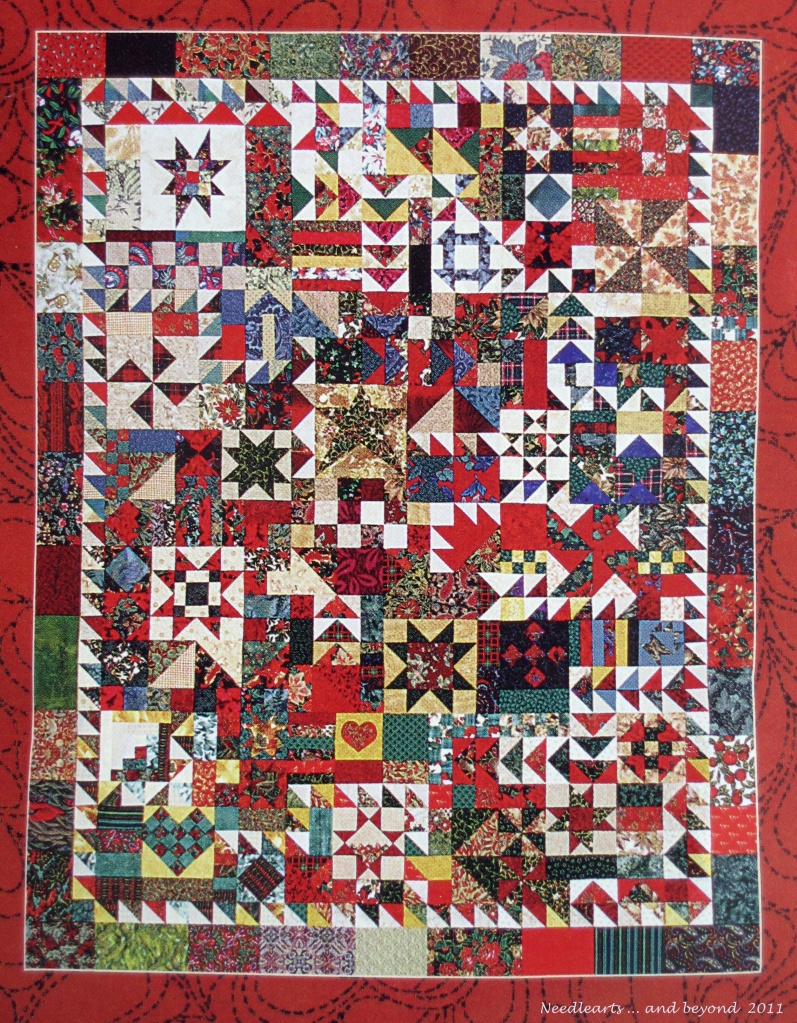
Christmas Potpourri Quilt - Block of the Month by Winnie S. Fleming


This is the photo that came with this super quilt kit!  The pattern was designed by Winnie S. Flemming and has a copyright of 1998.  It is a Block of the Month distributed by Quakertown Quilts.

If it looks familiar, it's because the Christmas Potpourri quilt is very similar to the Plaid Potpourri quilt (same idea, same designer).  There are 12 packs of fabric and instructions, each pack makes an 18" pieced block.  The border will be made from extra/leftover fabric.  My kit came from Great American Quilt Factory in Denver, Colorado.


18 October 2011

Water soluble graphite and quilting

The safari quilt came out of the washer looking great!  Once again, the white marks were completely gone -- not so with the graphite.  And.... once again, Fels Naptha to the rescue.

Water soluble graphite pencils from Fons & Porter did no better in disappearing during the wash than the Sewline Fabric Pencil in black. I did not try erasing the lines before washing the nap quilt, but I wish I had.  That will be the next test.

With both quilts, I used Quilt Care in a gentle wash on cold with a cold rinse.


17 October 2011

Nap Quilt Binding is Complete - What about the quilt marks?


Yesterday I finished stitching down the binding for the Safari Nap Quilt.  At the moment, the quilt is in the washer and I am anxious to see what happens to the quilt markings.

When I marked the quilt lines I used two products.  The Sewline white pencil and the Fons & Porters Water Soluble Graphite pencil.

05 October 2011

Quilting the Safari Nap Quilt


The latest throw quilt has been quilted! Please click on the photo above, take a close-up look at the quilting!  This was really fun to work on -- the smaller size makes such a difference.


After I found the YouTube about spray basting, I really wanted to give it a try.  Over the weekend I found the 505 brand at a local quilt shop and in less than one hour I: laid out the quilt back and taped it to the floor, spray basted the batt to the backing, spray basted the quilt top to the batt and cleaned up.  Amazing.


It is doubtful that I will every pin baste again.  Besides the time saving feature of the spray, since the "whole" surface is tacky the occasional pucker while quilting doesn't happen. How cool is that??

30 September 2011

New blog for my eBay items

I have created a new blog that I will be using to provide additional photos and information for my auction items, it is called jbf auctions.

Please bear with me while I make the transition from using this blog for that info.

For those who are looking for auction info you can still find it by selecting "Auctions" from the menu above or going to my new blog at jbf auctions

Safari Nap Quilt

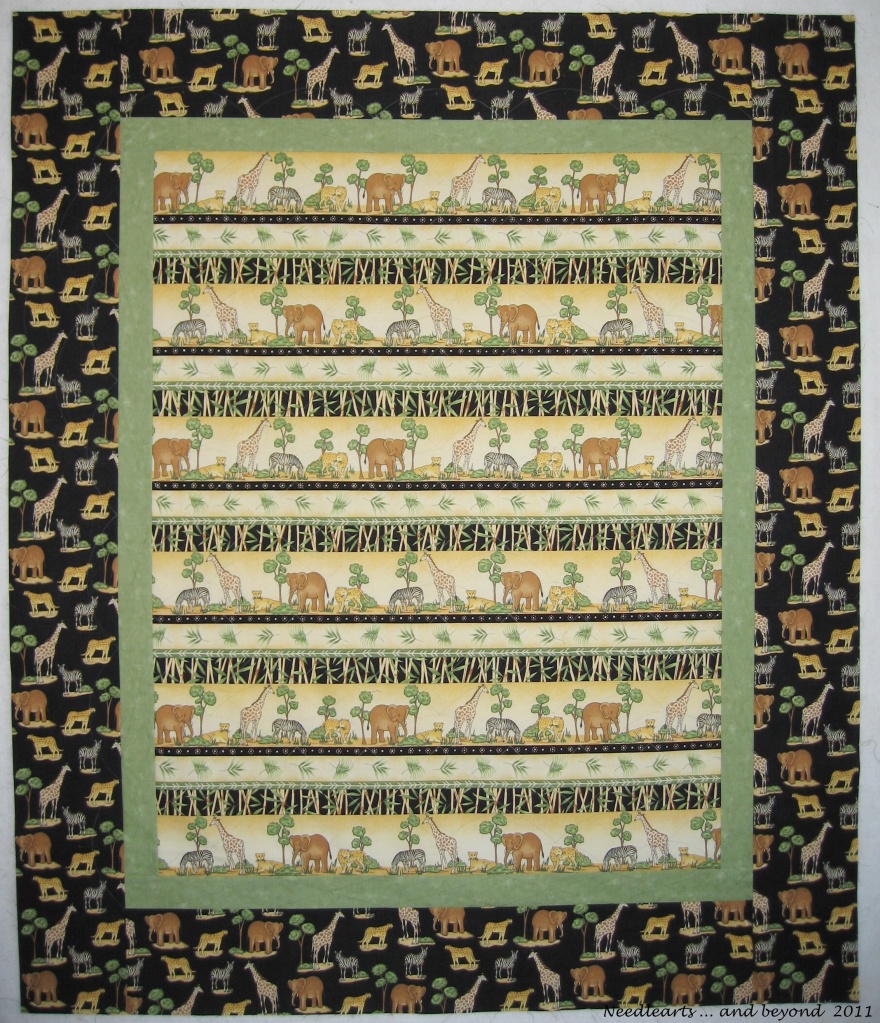
Safari Nap Quilt - In Progress


The latest project is another super simple quilt.  This is from a kit called "Safari Nap Quilt" from back in the day when Fabric Expressions of Littleton, CO was owned by Toni and Juanita.

I'm still drawing the quilting lines and am trying to expand my machine quilt skills from straight lines - portions are marked with scallops.  As I was looking online for some ideas of how to deal with the corners, I watched a YouTube on using basting spray rather than pins.   I definitely want to give that a try!

29 September 2011

Downsizing via eBay Continues

Items to be added September 30 and/or October 1


There will be new items on eBay this week including a handpainted needlepoint canvas by Ann, namaste buddy case, quilt kit called "Strips for all Seasons" and a pair of Earth shoes.

Cub Lake Quilt Kit to be added September 30


Since the Cub Lake quilt kit did not sell, I plan to re-list and offer free shipping for the high bidder on this fabulous kit!

Select "Auctions" on the top menu to learn more about these great items.

You can find my auctions at:

jbf auctions at eBay

24 September 2011

Downsizing continues -- a couple more items

Later today, I will be adding a couple more items to my eBay auctions.

Alto's Original QuiltCut Fabric Cutting System


Nantucket Harbor Needlepoint Kit designed by Erica Wilson


Click on "Auctions" on the top menu on this page to learn more about these items!


You can find my auctions at:

jbf auctions at eBay

23 September 2011

Downsizing my Resource Center - eBay Auctions

Gleneagle


Cub Lake Quilt Kit


It has been a few months since I have listed anything on eBay and I will be working on downsizing my "resource center" as part of my semi-annual organizing effort.  This will include various quilting and needlework related items -- and other items that are yearning for a new home.  This evening (23 September 2011) I will be listing the Gleneagle pattern book as well as an absolutely fabulous quilt kit called "Cub Lake"  if you missed the Moda fabrics "Winter at the Lodge" you will have an opportunity to work with those wonderful fabrics by bidding on this kit!

You can find my auctions at:

jbf auctions at eBay

21 September 2011

Quilting and Marking Tools -- removing, erasing and washing them out -- Fels-Naptha to the rescue

In my last post I stated that I had marked my row quilt top using different products.  I used the Clover White Marking Pen and Sewline pencils in white and black.  After I quilted my quilt, there were two lines running the full length of the quilt top I decided not to stitch.  Those lines were made with a Sewline black pencil.

I really should have taken a photo of the quilt when I took it out of the washing machine.  Sadly, I did not.  Perhaps my expectations were too high... but...

I really thought that all of the marks (and extra lines) would disappear in the wash.  I used Quilt Wash in a front loading machine, ran the delicate cycle with a medium spin.  The white marks were gone, yeah!!  The black marks were not, so sad.

According to the literature, Sewline marks should come off by erasing, washing or dabbing with a damp cloth.

1) Erasing removed most of the mark but not all -- while I was marking the top, I made a few marking errors.  I "erased" but it did leave a significant shadow. The residual lines did come out in the wash.

2) Washing removed the white lines -- both from the Clover White Marking pen and the Sewline white pencil. All of the black lines from the Sewline pencil remained.

3) Dabbing with a damp cloth is a method that I not try.  After taking the quilt out of the washer I did try wetting the lingering lines thoroughly and rubbing - no impact.

With all laundry stains, my go-to product is Fels-Naptha.  I ran the bar over the lines gave them a little rub and they were gone.  I tossed the quilt back into the washer and it came out great.

Will I use Sewline again?  Absolutely!  I just need to know the product limitations and how to deal with them.

Row by Row Quilt - It's Done!

Row by Row - Finished


I finished stitching the binding on Row by Row quilt this morning!  I am always surprised at how much easier (and faster)  it is to quilt and bind a lap-sized quilt versus a queen or king.  Row by Row has a finished size of about 58" by 88".

The quilting was done on a Elna Quilting Queen Pro using Signature cotton thread (40wt) and a stitch length of 3.0.  The longer arm makes it much easier to maneuver the quilt bulk than when quilting with a traditional machine!

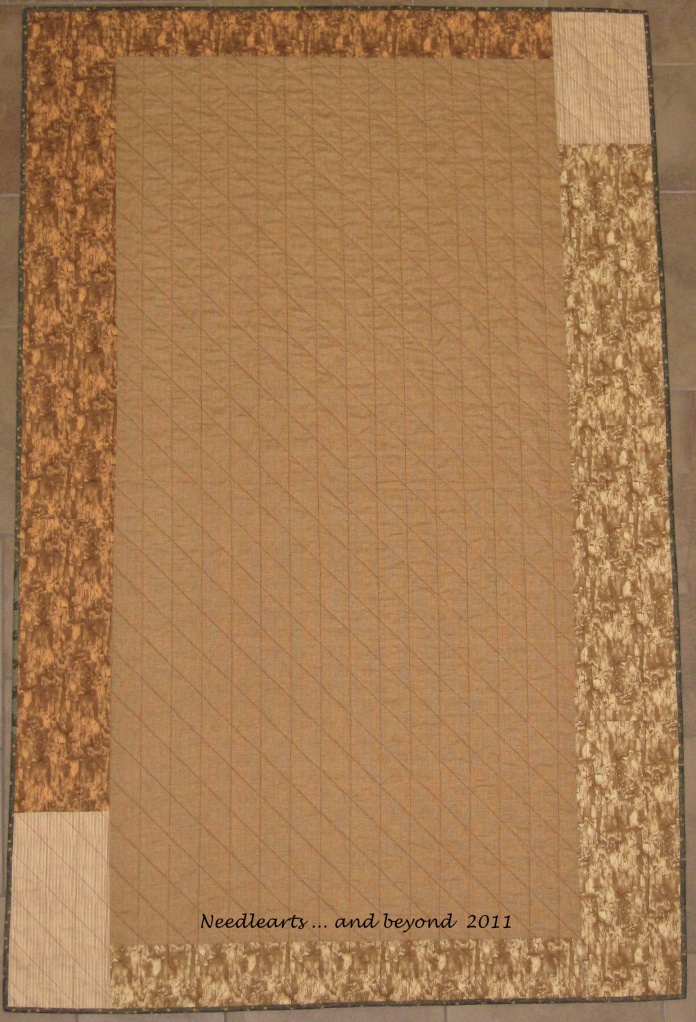
Row by Row - Back


The marking lines I drew on for the quilting were done with a combination of Sewline Fabric Pencils in black and white and the Clover White Marking Pen.  I am anxious to see if the markings come out in a gentle wash in my machine.

14 September 2011

A Row by Row Quilt

Row by Row Quilt


This is a partially completed project that I found in the closet a few weeks back.  It doesn't get much easier than this style quilt top -- the pattern is Row by Row by Thimbleberries.   The fabrics are certainly a clue to the age of this kit ... they are the some of the original Holly Taylor fabrics from Moda!

The center was already stitched and last week I added the two borders.  I found some Holly Taylor fabrics in my resource center to piece the back.  The quilt top is marked with a large hanging diamonds pattern -- lines are spaced every 2.5 inches.  Today's plan is to get the quilt sandwich pinned and start quilting.


04 September 2011

Knitting Bandages & Slipping That First Stitch


The current bandage that I am knitting was about half completed when the edges started really bothering me.  They looked messy and I didn't know why.  At some point yesterday, I realized that my sloppy edges were a result of slipping the first stitch purlwise rather than knitwise.  Needless to say, I felt a little silly -- the bandage was ripped and started again. Looks much better!


31 August 2011

A Tish Celebration Needlepoint - Week 1

A Tish Celebration


Some of my favorite needlepoint pieces were designed by Tish Holland.  I like the stylized southwestern look that is uniquely hers -- as well as her stitch and thread selections.

Several years ago I bought "A Tish Celebration", the design size is approximately 20 inches by 40 inches, it is painted on 14 count canvas, and came with a stitch guide (not by Tish).  I have most of the supplies and am just about ready to begin the stitching!

I'm not really sure if this is still available, the canvas is listed on the Sundance Designs online catalog, but no image is available.  Many of the individual elements in the piece are available as smaller, modified canvases -- Bread Making, Chili Harvest, Little Potter, Prickly Pear Harvest, and Three Sisters.

This link will take you to the Tish page of the Sundance Catalog ... Tish needlepoint designs.

25 August 2011

Knitting Bandages for the D.O.V.E. Fund


I have found a wonderful way to keep busy during my lunch break at work - my break is at an odd time and I'm usually alone.  I like to read and listen to recorded books.  I have been reading and listening to the Amelia Peabody series by Elizabeth Peters -- when listening to a book I can stitch or knit -- something simple that doesn't require much thought.  The past year I have been knitting bandages for the D.O.V.E. Fund -- I have finished three and am working on the fourth.

Football season provides many opportunities to knit bandages -- all those hours in front of the TV usually has me making cotton washcloths or dishcloths, now I will be working on bandages, too.

Information on the group that coordinates this effort can be found at
The D.O.V.E Fund Bandage Brigade

21 August 2011

Rhapsody Needlepoint - Completed!

Rhapsody Completed on August 20, 2011


The stitching on Rhapsody was finished yesterday -- I haven't added a row of goeblin around the piece since I don't know how it will be finished.


Wow!! A fun piece to stitch.  I found a few more errors in the graphs but they are minor and a confident stitcher should see the errors before stitching.


Additional tips for your stitching enjoyment:


The suggested size to cut the canvas is too small -- I didn't realize that until I was well into the stitching.  Cut your canvas 11" by 16" (or larger if you can't find 11" bars).   I staple my canvas to the top of the stretcher bars and there was barely enough room to start and stop along the side edges.  If you staple to the bottom you won't have a problem.


Some of the stitch sequences are somewhat unusual.  Try to bring your needle up into an empty space and down in a full space - this is not always possible.  Also, your stitches will be more defined and lovely if you are able to "wrap" the canvas threads.


The companion piece - Romance - is already in my stack -- I might use the same colors as I used for Rhapsody.

13 August 2011

Rhapsody Needlepoint - Week 2

Rhapsody - Week 2


The Rhapsody project continues!  There are a total of ten different Watercolours that are used in the piece -- all have been stitched.  I can't wait to see how they look as they are repeated.  So far, so good!

This is a fun piece to stitch --- but.... (yes, always a "but") I have found a few errors in the charting.  They will not be a problem for an intermediate/advanced stitcher, however, if you are new to needlepoint you may need a little help.

I started in the center (as suggested) and am working from left to right - one vertical ribbon at a time.  After that is complete I will work from center in the opposite direction.   These are the charting errors I have found so far....

Stitch 8:  has been charted over 7 rather than 6 canvas threads -- there should be an additional straight gobelin at the far right for a total of seven, the slanted gobelin sequence in the bottom left is charted one canvas thread too wide left.

Stitch 10:  stitch 16 should be over two intersections and start directly under stitch 15, stitch 25 should  start in the same position as charted but over one intersection only.

Stitch 14:  stitches 17 through 24 point the wrong stitch direction.

Stitch 42:  the stitch is charted over eight canvas threads rather than nine.  Extend the slanted gobelin on each side by one stitch, dropping the bottom rhodes by one stitch -- add two tent stitches between rhodes stitches.

Stitch 47;  top and bottom straight gobelin -- there should be seven stitches  for each -- add one to each side.

Stitch 65:  doesn't match photo... cross stitch 4/5 should be over 4 laid threads, cross stitch 10/11 should be over 4 laid threads.  Put in stitch 6 and then put in the 4/5 cross over all four threads,  repeat stitch six  and put in the 10/11 cross over all four threads.

Stitch 76:  doesn't match photo... to duplicate the photo, stitch 7 should start one thread lower and end one thread higher  -- it will cover all horizontal threads as well as the giant cross.

07 August 2011

Half Dozen Pillowcases


This morning I finished up six pillowcases.  This uses up all of the yardage that went with the Almost a Log Cabin quilt.  On Thursday, I pressed and cut fabric and yesterday stitched the cases together. This morning I finished pressing the completed cases.

All six pillowcases were made using the burrito method, the finished size of each is approximately 20" x 32".  Fabrics were cut as follows:  body - 28" by width of fabric (wof), cuff - 10" by wof, and trim - 2.5" by wof.  I used a walking foot for all stitching.

Four of the pillowcases are flannel,  with the final stitching of the french seam the thickness of the layers at the trim area is challenging.  Using a walking foot is not enough to compensate for trying to stitch through 14 layers of fabric.  I ended up feeding the fabric through stitch by stitch.  When using flat fabric this was not an issue.


04 August 2011

Pillow Shams and Needlepoint

Almost A Log Cabin Pillow Shams


This afternoon I finished pillow shams that go with the Almost a Log Cabin quilt.  The overall finished size of each is 20" x 30".  I bought enough fabric so that I will be able to make about 6 coordinated pillow cases.

Rhapsody - Week 1.5


There were not enough hours in the past week for me to make much progress on the Rhapsody project.  The second ribbon is about 3/4 complete.  I'm anxious to see how the color selection impacts the design.

30 July 2011

Rhapsody by Amybear - Week 1


The supplies for Rhapsody have been on my pressing table for over a month.  As soon as E. Mears was finished, I started getting the Rhapsody project ready for stitching.

Marking the canvas was easy... with one exception.... the designer suggests putting the letter and number designations onto the canvas.  Well... I put in half of the letters and then decided that I placed them too close to the actual work area.  Not really an issue and but if it really starts to bother me I have Ceramcoat ready.  Then I started putting in the numbers -- with the amount of space available not an easy task, so those numbers went onto the edge fabric.

The stitching has barely been started but I am sure that this will be a fun project with all stitching done with one strand of Watercolours on 18 count canvas.  My color selection is trying for a tropical look - but - with overdyed threads the result isn't always what I expect.

Rhapsody - Week 1

29 July 2011

Pillowcases are fast and fun


It's fun to be able to start and finish a project in one day!! Really, it was a couple of hours and I had two great pillowcases.  I will keep track of the time with the next one because I'm curious to know how long it actually takes.

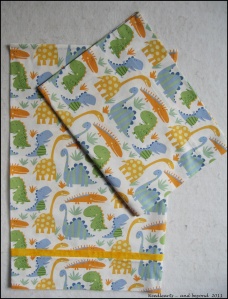
Today I made two dino pillowcases.  The one at the top that is folded in half goes super fast because it is just one piece of fabric.  The second case was made using the burrito (or rolled) method.

These are links to websites that show how to make the second pillowcase - same process with different presentations.

Rainy Day Quilt School
http://www.rainydayquiltschool.com/Rolled%20Pillowcase%20Pattern.pdf

MaryQuilts.com
http://www.maryquilts.com/pillowcase/

There are a variety of pillowcase patterns at allpeoplequilt.com for the 1 Million Pillowcase Challenge -- great inspiration!
http://www.allpeoplequilt.com/millionpillowcases/freepatterns/index.html

27 July 2011

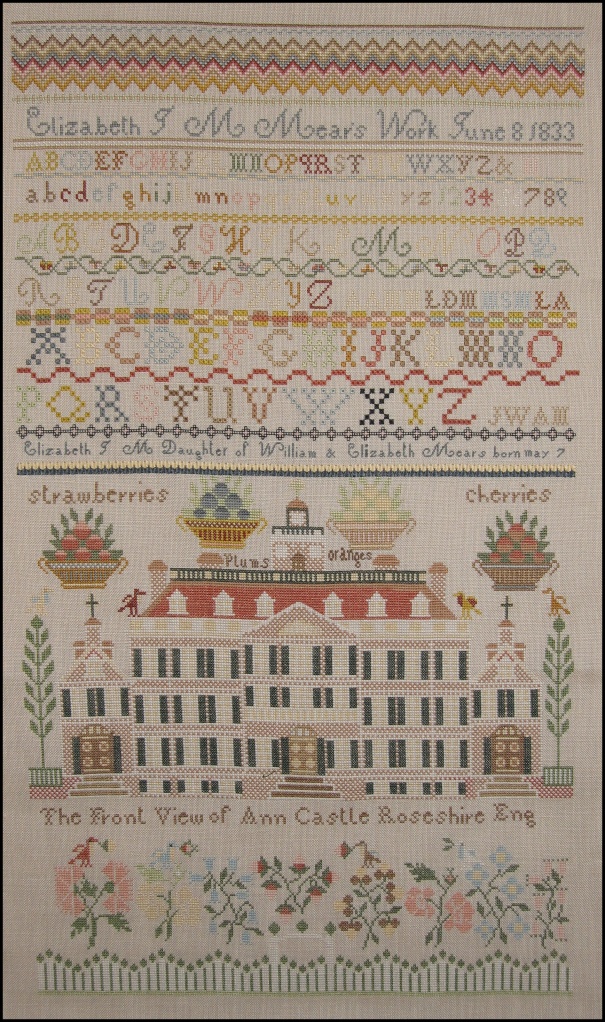
Stitching with Lizzie - Week 30 - Complete!!

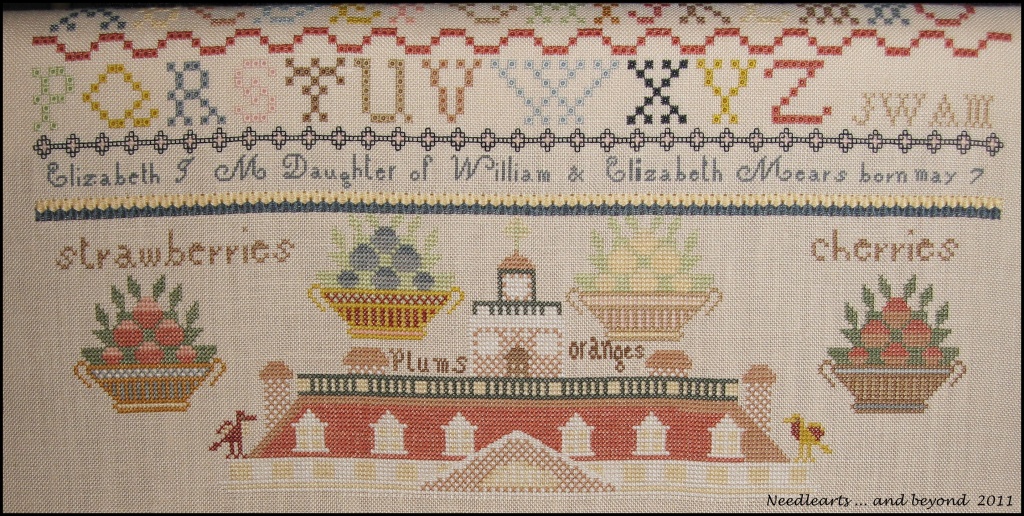
Elizabeth Mears Sampler - Completed 27 July 2011


This morning I completed the stitching for the Elizabeth Mears reproduction sampler.  I haven't decided how I am going to sign it, but that doesn't really count as part of the the stitching.


I am completely delighted with the way it turned out -- mistakes and all!  This is the largest and one of the most beautiful pieces I have stitched completed.


Am I the only stitcher that would pay more for a chart if the designer would provide some overlap stitches from one page to another?  I had been away from the cross stitch world for some years and with recent purchases of large charts I have been dismayed (putting it nicely) that designers have dropped the overlap section.  This is forcing me to make copies and do a cut and paste activity to be sure my stitching is in the correct position when moving from one page to the next.  The chart for this sampler is an example of the lack of overlap.  Perhaps it is now the industry standard -- but seriously, how hard can it be to add a couple more rows the the page?


In spite of the shortcomings of the chart for this sampler, it was a great stitch!


13 July 2011

Stitching with Lizzie - Week 28

Elizabeth Mears at week 28


This fabulous house looks so much better in person!  This week I have, once again,  spent several hours working exclusively on the Elizabeth Mears sampler.  I am hoping that by this time next week the house will be complete even there is still quite a bit to be done.

07 July 2011

Stitching with Lizzie - Week 27


Elizabeth Mears at Week 27


Wow -- what a difference a week makes!  The castle is stitching up quickly -- even for me, one of the slowest stitchers on the planet.  Once the gable is complete, the remaining stitching is simple cross stitch. Perhaps an August finish??

I've tried a couple different ways to work the checkerboard brick work -- putting in a whole section of white and then filling in with the brown, working on a diagonal, putting in the brown and then filling in the white....etc.  In my opinion, it is easiest to work in horizontal rows with two needles -- put in the white, fill in the brown and then drop to the next row.

30 June 2011

Stitching with Lizzie at week 26 - what was she thinking??

Lizzie at Week 26


The past week, I have only stitched on Lizzie aka Elizabeth Mears.  I have spent a ridiculous amount of time stitching the center gable at the roof line.  The white outer edge of the gable is stitched one thread high and two threads wide with plenty of partial stitches to confuse me.  Needless to say, it took a couple of attempts to have a gable that was presentable and I'm fairly pleased with the result.

If you are stitching this piece, I suggest you follow Barbara's direction and put in all of the full and partial stitches surrounding the gable first and then go back and work symbol 9.  Even with that I found that I needed to mark my progress on my chart to keep my stitches in the correct positions.

Since the high temperature continues to hover in the 110 degree plus range, it should be another good week for stitching.

22 June 2011

Stitching With Lizzie - Week 25


Elizabeth Mears Sampler - Week 25


This is Elizabeth Mears  at Week 25.  The baskets came out great and the big house should start taking shape soon. I'm sort of wishing I had selected a darker ground fabric so that the house will stand out a bit more.... but .... I really wanted to use the church linen.


Mr. Snowman - Ornament #5


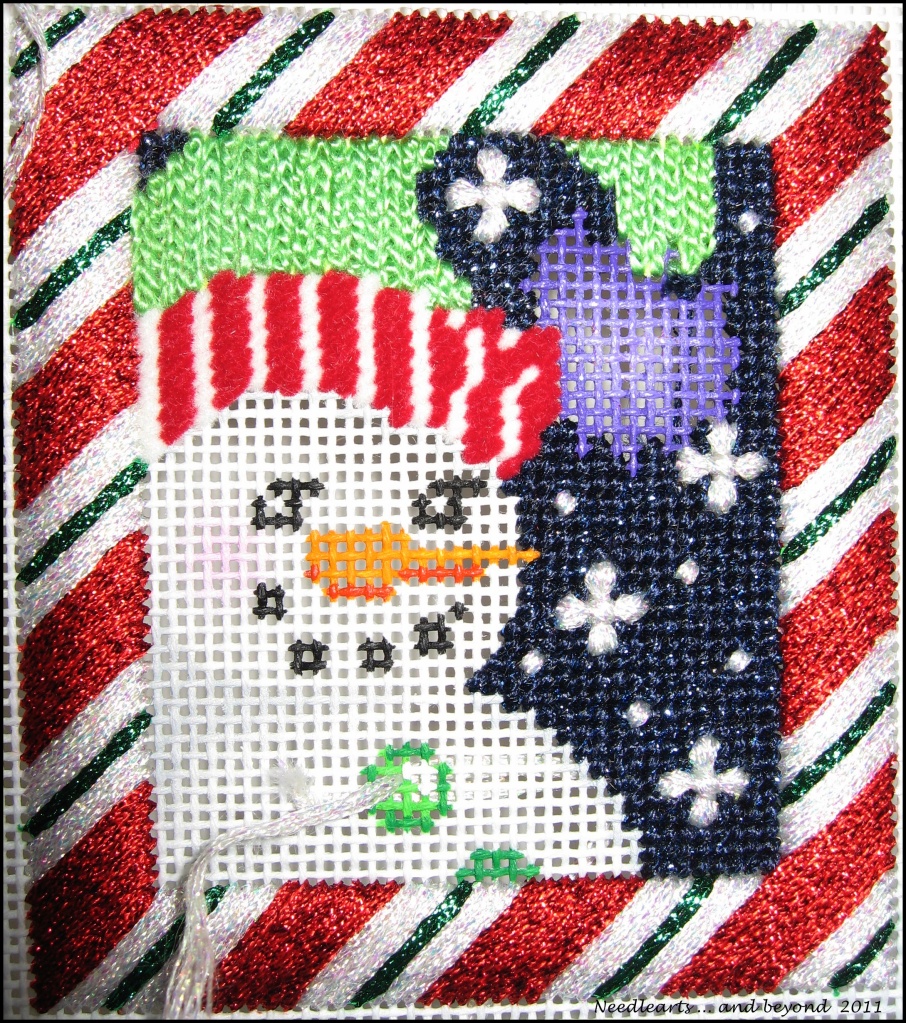
Ornament #5 is still in progress. I was distracted with the pompom on the hat.  The stitch guide uses modified turkey work that is then cut, but I've never been a fan of that stitch.  I have a few ideas...
18 June 2011

Gingerbread Man Ornament - Update


The poor little gingerbread man looked like the frosting was running out when he got his bow tie.  Much better......

16 June 2011

Ornament Club Numbers 3 & 4

Gingerbread Man Ornament


Mr. Snowman Ornament


This week is the "Joyful Stitchers" meeting so I have been trying to catch up on my monthly ornaments.  The completed Gingerbread Man is ornament #4 and Mr. Snowman is coming along and might be finished before Thursday stitching.
09 June 2011

Almost A Log Cabin -- Finished!!


After stitching miles and miles (412 inches) of binding.... it's done!  It would definitely be a super fast finish to do the entire binding by machine, but bindings are one of my "things".   I like the look of the finished quilt  so much better when the binding is completed by hand.

Soon I will make pillow cases and pillow shams.   I have matching yardage in woven fabric for pillow cases and there should be enough flannel to make at least two shams with a log cabin of some kind that will coordinate with the quilt.

Next up  --  catching up on the monthly ornament club and spending some time with Lizzie.


02 June 2011

Almost A Log Cabin - Quilted


The "Almost A Log Cabin" is quilted!  In order to have the grid cross the center of each block the quilting is spaced at about 2.75".   I like the look of simple grids -- must be why I also like needlepoint and cross stitch.

I was asked about the time difference in quilting on a home machine vs on a longarm.  Since I don't currently do free motion on my Elna it isn't a straight comparison, if I had done the quilting on my old longarm I would have used a panotgraph and the result would be totally different.  With that in mind, my estimate is that it takes me about about 8 times longer to do the quilting on a home machine vs longarm.

27 May 2011

Almost A Log Cabin Quilt

Almost A Log Cabin Quilt


As I was getting the backing ready for the "Almost A Log Cabin" quilt, I decided to try grid quilting using masking tape to mark the stitching lines. Hee, hee -- that didn't go so well... the fabric is flannel and the tape got a bit too strong. Add to that -- the "almost" part of the name of my quilt -- the lines are not as straight as they should be.


This was my first log cabin quilt. I finished the top several years ago and added a border a couple of weeks ago. It was originally planned to be an oversized quilt for a twin bed. The addition of the borders should make it large enough for a queen.

A couple of the anchor lines are stitched and now I am marking the grid lines. The final quilting will be a grid pattern with spacing at about 2.75". It is definitely easier to mark a quilt before pinning, but -- you work with what you have.

21 May 2011

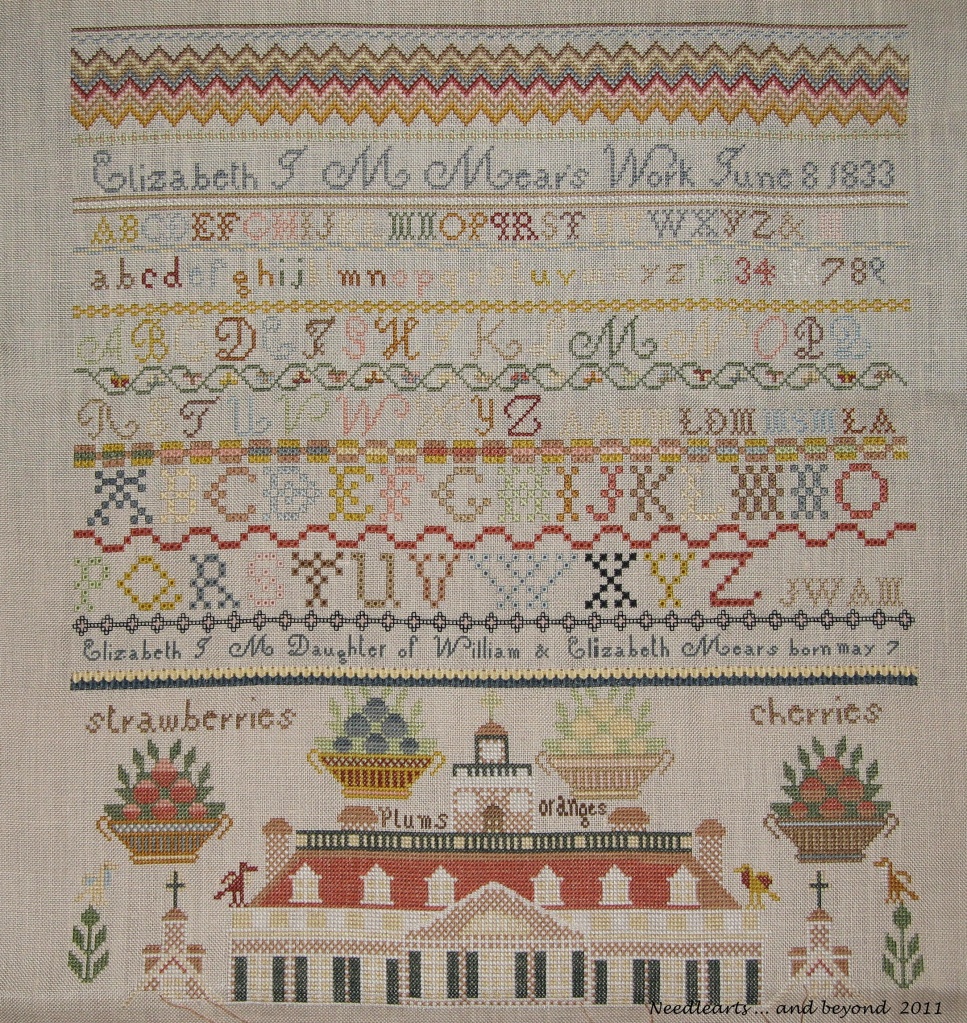
Elizabeth Mears at Week 20

Elizabeth Mears - Week 20


During the past week I completed the queen stitch band and a portion of the baskets and words.  It looks great but it will go on the back burner while I get some quilting done.

12 May 2011

Elizabeth Mears Stitching - Week 19

Lizzie at Week 19


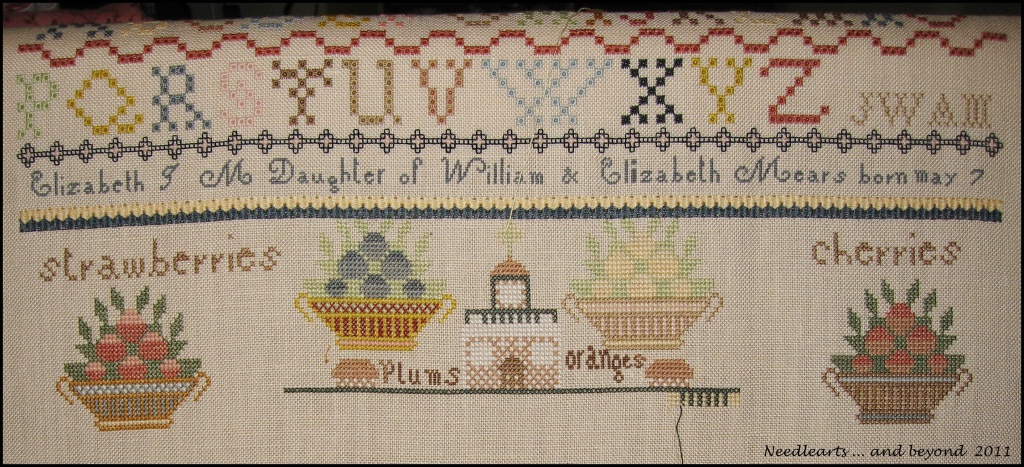
On to the baskets!  Don't you just love the berry baskets on this sampler?  I continue to follow the schedule and the suggestions that have been made by Barbara of Queenstown Samplers.  The queen stitch row is marked and will be stitched after completing a small portion of the section just below it - the leaves of the baskets, top of the building and the fruit words.  So glad that she provided the stitch schedule through July!